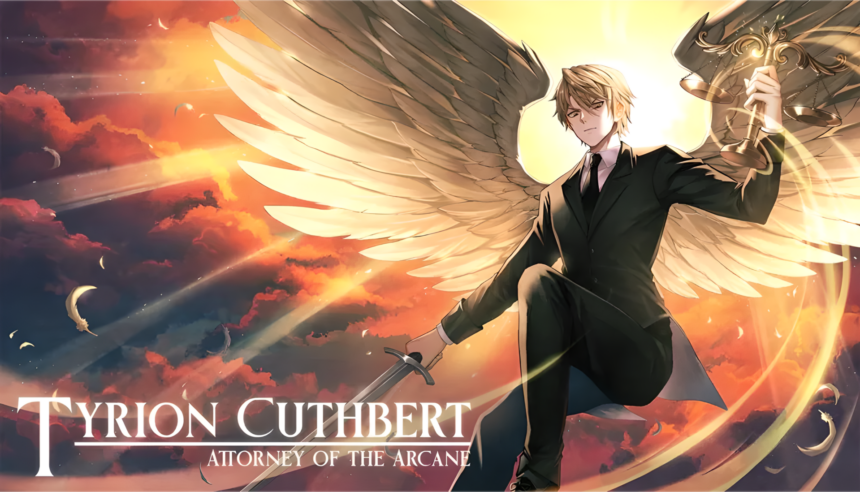
This guide is built to cut through the noise and get you through Tyrion Cuthbert: Attorney of the Arcane with zero confusion and zero wasted time. Every case is broken down into precise, actionable steps so you always know exactly what to present, when to press, and how to progress without guessing or backtracking. Choices, evidence, and deductions are laid out in a clean, optimized route so you can focus on solving each case instead of fighting the game’s complexity. If you follow this guide properly, you won’t miss key interactions, you won’t hit dead ends, and you’ll consistently dismantle every contradiction the game throws at you.
Case 1 – The Coldhearted Aristocrat
Episode 1-1
“I only trade organic products”
PRESENT → Store-Bought Apple Juice
“This juice is worth far more than what I’m offering”
INTERPRET → Intuition (his claim contradicts his intent)
Episode 1-2
Cross Examination – Orym White
Claim: “She killed him with a magic sword”
PRESENT → Celeste’s Sword (it has no magical properties)
Claim: “Transmutation magic caused the wound”
PRESS (unlocks new statement)
New claim: “She stabbed him from the front”
PRESENT → Autopsy Report (confirms stab from behind)
Episode 1-3
Investigation (Do not skip)
Examine bottle near body
→ Shattered Bottle of Lotus Juice
Examine wall lamp
→ Broken Power Cell (confirms no lighting)=
Argument – Orym White
Ruby Tymora is a crooked lawyer → Defend
Second claim → Defend
“I have no reason to trust you” → Defend
(You are countering his bias, not proving facts here)
Deductions (Answer exactly)
How did Flinhart die
→ Didn’t move during the murder
How did the bottle break
→ Dropped during the attack
State of the crime scene
→ No lighting during the murder
Progression (Don’t miss anything)
Move → Upstairs (door locked)
Move → Inquisition Barracks
Talk → Celeste → obtain Bedroom Key
Move → Celeste’s Bedroom
Talk → Flinhart McCoy → unlock Flinhart’s Sister
Return → Barracks
Argument – Celeste (All emotional contradictions)
“He always hated magic”
PRESENT → Flinhart’s Sister (he cared about family)
“It was selfish of me to learn magic”
PRESENT → Celeste’s Occupation (it’s her role)
“He felt betrayed when he died”
PRESENT → Shattered Bottle of Lotus Juice (he intended to apologize)
Episode 1-4
Cross Examination – Rhys
Statement about blue light in the room
PRESENT → Broken Power Cell (room had no power)
Statement claiming Mage Blade glow
PRESENT → Mage Blade (does not explain lighting)
Cross Examination – Garrick Pierce
Statement describing what he saw
PRESS (adds crucial detail)
Statement claiming he saw clearly using light
PRESENT → Conjure Light (limited range, contradicts visibility)
Deduction
Which spell was used to kill Flinhart
→ Shape Liquid
(Weapon formed from liquid, not a sword)
Final Argument – Garrick Pierce
“I saw the murder clearly”
PRESENT → Conjure Light (his vision was limited)
“She was holding her sword after”
PRESENT → Crime Scene Picture (contradiction in positioning)
“I came here to reveal the truth”
PRESENT → Perjury by Garrick Pierce (he already lied)
Empowered Eye (Do not guess)
PROJECT → Shape Liquid
“No liquified weapon was found”
PRESENT → Shattered Bottle of Lotus Juice
(The weapon reverted after the attack)
Case 2 – The Walking Dead
Episode 2-1
Investigation Setup
Talk → Eris and Wallace
Talk → Tyrion and Celeste
Talk → Supernatural Phenomena
Talk → The Ancient Dragon
Key Note – Arcane Constructs
- They follow commands in order
- They store command logs
- Logs must be manually cleared
- Voice is controlled by the headmaster
(This becomes critical later—don’t ignore it)
Episode 2-2
Investigation (Lecture Hall 2-B)
Examine white line
→ Bloodstain Under the Body (confirms heavy bleeding)
Use Detect Magic → scan area
Purple trace
→ Autopsy Report: Catherine Bellwether
- Time of death: 2:01 PM
- No wounds
- Necromancy + illusion detected
Green trace
→ Foul Classroom Smell (alchemy vapor present earlier)
Core Information Gathering
Talk → Murder
→ Imperial Academy Map
Talk → Body discovery
→ Who Discovered the Body
Talk → Wallace as suspect
Headmaster’s Office
Talk → Murder
→ Academy Lockdown System
(Key: seals all rooms, no entry or teleport)
Talk → Wallace’s Compendium
→ Unattuned Spell Compendium
Talk → Bellwether
→ Bellwether’s Reputation
Kitchen
Talk → Witness accounts
Talk → Wallace
Talk → Bellwether
Hallway
Talk → Jan Hughes
→ Jan’s Statement
(Timeline clue: Bellwether enters Lecture Hall 2-B after confrontation)
Talk → Bellwether
→ Bellwether’s Plan (replace staff with constructs)
Barracks
Talk → Spell Compendium
→ Wallace’s Spell List
Deduction
How is Wallace implicated
→ Necromancy trace on body
Which spell is suspected
→ Necrotic Blight
What’s wrong with crime scene
→ Body covered in blood (contradiction: no wounds)
Kitchen – Argument (Valentina)
Psychological rule: She protects herself first
“My conscience is clear”
EMPATHY
“I don’t have to tell you anything”
THREATEN
“I don’t know anyone who can use magic”
PRESENT → Valentina’s Magical Trace
Follow-up Deduction
Why doesn’t Valentina realize the magic used
→ The spell healed her
Episode 2-3 (Trial Phase)
Cross Examination – Orym White
“There were no wounds on the body”
PRESENT → Bloodstain Under the Body
Deduction
Which spell leaves necromancy trace
PRESENT → Mend Wounds
(healing magic = hidden cause of death)
Cross Examination – Valentina
“She tried to stop the bleeding”
PRESS
“She applied first aid”
PRESENT → Autopsy Report
(no wounds = contradiction)
Final statement (about alibi)
INTERPRET
Deduction
How did the twins deceive the Inquisition
→ Valentina switched places with Valerie
Episode 2-4
Core Logic Build
Talk → Illusion Magic
→ Major Illusion
Locker Room Investigation
Examine Miriam Frega’s locker
→ Blood evidence
Deduction
Most suspicious locker
→ Miriam Frega
Argument – Aria Steelwind
“She hasn’t changed behavior”
PRESENT → Steelwind’s Orders
“Why would I act like this?”
PRESENT → Four Pillar Families
“My investigation excludes Frega”
PRESENT → Evidence in the Locker
Final push
THREATEN
Evidence Gained
→ Evidence of Academic Dishonesty
→ Bloody Rapier
Key Mechanic
Construct Logic Limitation
- If a task sequence fails midway → stops entirely
(This will solve the case later)
Episode 2-5 (Final Trial)
Cross Examination – Miriam Frega
“She saw Bellwether at 1:00”
PRESS
Then
PRESENT → Steelwind’s Deduction
(timeline contradiction)
Cross Examination – Jan Hughes
PRESS all follow-ups
Then
PRESENT → Animate Corpse
Deduction
What created Bellwether’s voice
PRESENT → Arcane Constructs
Who ordered the construct
PRESENT → Theodore Redmond
Cross Examination – Headmaster Redmond
“No motive”
PRESENT → Bellwether’s Plan
(Repeat when restated—same contradiction)
Final Argument – Redmond
“I couldn’t overpower her”
PRESENT → Arcane Constructs
“I wouldn’t leave evidence”
PRESENT → Evidence in the Locker
“No mistakes were made”
PRESENT → Construct in Locker Room
“No evidence of orders”
PRESENT → Construct in Locker Room
Empowered Eye (Final Logic)
PROJECT → Construct’s Logic Limitation
PROJECT → Construct in Locker Room
Final Deduction
What stopped the construct
PRESENT → Academy Lockdown System
How did lockdown affect events
→ Command sequence was interrupted
Case 3 – The Origins of Horus
Episode 3-1
Setup
Talk → Celeste McCoy
Talk → Tyrion Cuthbert
Talk → Rika’s Cafe
Talk → Aurinax City
Talk → The Chess Tournament
Talk → The “Thing”
Key Note
Aurinax Blockade
No one can enter or leave the city
All residents are accounted for
(This eliminates outside suspects later)
Episode 3-2
Investigation
Talk → The Accident
Talk → The Victim
Talk → The Walkway
Talk → Witnesses
Walkway
MOVE → Arcane Refinery: Walkway
EXAMINE → Detect Magic
EXAMINE → Yellow Spot
Deduction
How did the spell affect the guard rail
→ Weakened its structure
Why weaken the rail
→ To make someone fall into the vat
Harbour
MOVE → Aurinax Harbour
Talk → What did you see
Talk → Guard Rail
Talk → Patron
Talk → Blockade
Talk → Aster
Tavern
MOVE → Aegwyn Tavern
EXAMINE → Furthest Door
Talk → Aster
Talk → The Accident
Talk → The Way He Fell
Talk → Are You a Mage
Cafe
MOVE → Mosourika’s Cafe
Talk → Why were you at the refinery
Talk → Justin’s Behaviour
Talk → What did you see
Talk → Justin Waye
Key Progression
Talk → Justin’s “Bad Crowd”
PRESENT → Mosourika’s Food Delivery
Argument – Mosourika
“I wasn’t that close to Justin”
PRESENT → Rika Helped Justin
“I only helped him because I’m generous”
DOUBT
“He kept his past secret”
INTUITION
“Nothing strange about his behavior”
PRESENT → Justin’s Meeting
After Argument
Talk → Where are the delinquents
Abandoned House
MOVE → Abandoned House
Talk → Justin Waye
Talk → Lockpicking and Safe-cracking
Talk → Justin’s Debt
Key Evidence
→ Justin’s Planned Robbery
→ The Eyetaker
Progression
MOVE → Aurinax Harbour
PRESENT → The Eyetaker
MOVE → Arcane Refinery
Episode 3-3
Cross Examination – Morrison
Final statement
PRESENT → Mosourika’s Testimony
Cross Examination – Mosourika
Statement describing fall
PRESENT → Aster and Morrison’s Testimony
Deduction
What happened
→ Another person fell into the vat
“This was an accident”
PRESENT → Transmutation on Guard Rails
Episode 3-4
Investigation
Talk → The Trial
Walkway
MOVE → Refinery Walkway
EXAMINE → Green Liquid
Key Evidence
→ Neutralizing Liquid
→ Vat Contents
Deduction
How did metal shards appear
→ A metal object fell into the vat
What should happen to metal
→ Completely destroyed
Why wasn’t it destroyed
→ Liquid was neutralized
Progression
MOVE → Town Square
MOVE → Von Sanctus Manor
Talk → Trial
Talk → Aria Steelwind
Talk → Missing Attendant
Talk → Von Sanctus Industries
Key Evidence
→ Products from Von Sanctus
→ Rod of Mending
Episode 3-5
Cross Examination – Mosourika
Statement about locked door
PRESS
Statement claiming only Dracogen could unlock it
PRESENT → Justin’s Planned Robbery
Statement about constructs breaking lock
PRESENT → Products from Von Sanctus
Deduction
Who sent the construct
PRESENT → Lloyd von Sanctus
Cross Examination – Lloyd von Sanctus
Claim: no communication with construct
PRESENT → Send Message
Argument – Lloyd
“Someone else could have sent it”
PRESENT → Products from Von Sanctus
“I sold constructs to others”
INTUITION
“Saboteur could be outsider”
PRESENT → Aurinax Blockade
Final Deduction
What links von Sanctus to the crime
→ Object he attuned to
How he destroyed evidence
→ Threw it into the vat
What else was destroyed
→ Arcane Construct
Motive
Why sabotage the rail
→ To make the death look like an accident
Case 4 – Severed Ties
Episode 4-1
Trial Start
Final statement
PRESENT → William Frega’s Inheritance
(Establishes motive is false)
Episode 4-2
Gallery Investigation
MOVE → Gallery
EXAMINE → Armbands (Left)
EXAMINE → Earrings (Right)
EXAMINE → Sword (Center)
Key Evidence
→ Armbands of Intellect (boost intelligence)
→ Earrings of Vitality (healing + lifespan)
→ Sword of Spell Eating (nullifies magic)
Critical Mechanic
Familial Bond
Allows:
- remote casting
- shared senses
- remote actions
(This is central to solving the case)
Important Condition
Beatrice is completely blind
(This breaks the prosecution’s entire logic)
Episode 4-3
Study Investigation
MOVE → William Frega’s Study
Key Evidence
→ Autopsy Report
→ Murder Weapon (letter opener, crushed)
→ Anti-Magic Field
→ Lockdown System
Core Logic
When did the murder happen
→ During lockdown
Where did weapon come from
→ Inside the study
What is wrong with prosecution
→ Beatrice is blind
Beatrice Room
MOVE → Beatrice’s Bedroom
EXAMINE → Detect Magic
EXAMINE → Yellow Spot
PRESENT → Beatrice’s Story
PRESENT → Autopsy Report
Storage Room
MOVE → Storage Room
Talk → Jan Hughes
Key Detail
Jan heard:
- struggle
- victim speaking
- stabbing
(No magic used at that moment)
Sitting Room
MOVE → Sitting Room
Key Evidence
→ Laefe’s Engagement
(Establishes motive shift)
Argument – Laefe
“I don’t know what father was doing”
PRESENT → Laefe’s Testimony
“I wasn’t involved”
RATIONALIZE
“I didn’t know about the will”
PRESENT → Laefe’s Engagement
“I can’t trust you”
APPEAL
Episode 4-4
Trial
Miriam statement
PRESENT → William Frega’s Inheritance
Laefe statement
PRESENT → Laefe’s Engagement
Episode 4-5
Study Follow-Up
MOVE → Study
Key Evidence
→ Modified Will (invalid, stolen)
Sitting Room
MOVE → Sitting Room
Critical Fact
Beatrice Alibi:
- present entire night
- witnessed by multiple people
- present before sword theft
Beatrice Room
MOVE → Beatrice’s Bedroom
Deduction
What did Tracker hear
→ Rats in vents
Why bond failed
→ Anti-Magic Field
Why bond returned
→ Sword of Spell Eating
Hallway
MOVE → Hallway
EXAMINE → Vent
EXAMINE → Detect Magic
EXAMINE → Green Spot
Key Evidence
→ Tracker saw “flying rat”
→ Sword dropped from vent
Episode 4-6
Trial – Haroldson
Statement about finding familiar
PRESENT → Lockdown System
Deduction
Who was in vents
→ Eugene
Why he could act alone
→ Armbands of Intellect
Eugene Testimony
Where are Armbands
→ Eugene is wearing them
Final Deduction
How sword reached hallway
→ Dropped by thief
Why thief was there
→ Moving through vents
Murder method
→ Familial Bond
Episode 4-7
Alaric Testimony
Claim: no magic used
PRESENT → Invisibility
Demon Testimony
Why “master” is used
→ Beatrice is not the master
Why demon can’t lie
→ Demons cannot lie
Final Argument – Beatrice
“I brought nothing dangerous”
PRESENT → Familial Bond
“I committed no crimes”
PRESENT → Sword of Spell Eating
“Marrunath will take blame”
THREATEN
Final Logic
How to prove Beatrice’s control
→ Physical link between Beatrice and Marrunath
What makes their link unique
→ Pact
Who explains demonic pacts
PRESENT → Harold Haroldson
Case Resolution
Beatrice used:
- Familial Bond (remote execution)
- Sword of Spell Eating (bypass anti-magic)
- Demonic Pact (execution tool)
Case 5 – Attorney of the Arcane
Episode 5-1
Setup
Talk → Tyrion
Talk → Aria
Talk → Celeste
Talk → Ruby
Key Evidence
→ Letter from Garrick Pierce
(Meeting arranged in Prayer Room at 2:00 PM)
→ Map of Cathedral
Important Observation
Beatrice was seen at 2:30 PM in the Prayer Room
(This contradicts expected timeline)
Episode 5-2
Core Situation
Victims:
- Garrick Pierce
- Coraline Sibyl
- Lloyd von Sanctus
Aria Steelwind is arrested
Prayer Room
MOVE → Prayer Room
Key Evidence
→ Celeste’s Testimony
(Aria fought guards, Pierce already dead)
Detect Magic
EXAMINE → Yellow
EXAMINE → Purple
EXAMINE → Blue
Common Room
MOVE → Common Room
Key Evidence
→ Autopsy: Pierce (2:45 PM, Shape Liquid blade)
→ Autopsy: Sibyl (2:18 PM, drowned)
→ Autopsy: von Sanctus (2:05 PM, suffocation + fire)
Deduction
How Sibyl died
→ Thrown from balcony
What’s wrong with order
→ Pierce could not be second victim
Core Route Logic
Murder path:
→ Common Room
→ Balcony
→ Prayer Room
(Not the most efficient → intentional misdirection)
Balcony
MOVE → West Balcony
Key Evidence
→ Archeus saw Aria throwing something
→ Debris with transmutation traces
Garden
MOVE → Garden
Key Mechanic
→ Force Cage trap on Aster
Result:
→ Guards redirected
→ Targets left exposed
Nave
MOVE → Nave
Key Evidence
→ Marrunath meeting (valid alibi)
→ Aria attacked Alaric (mental impairment spell)
Dungeon
MOVE → Dungeon
Key Evidence
→ Aria has no memory
→ Purple Mark (mind control indicator)
Argument – Aria
“Mind control is real”
DOUBT
“Just a killer”
PRESENT → Alaric’s Testimony
“No need to enter cathedral”
PRESENT → Force Cage
“Fighting risks lives”
THREATEN
Episode 5-3
Trial – Beatrice
Statement about no evidence
PRESENT → Purple Mark
Deduction
What event
→ Marrunath hid the mark
Why demon interference
→ Mark is demonic
How Beatrice lost control
→ Blood Contract
Key Reveal
Aria also under Blood Contract
→ Empress of Discord
Episode 5-4
Trial – Orym
Claim: Aria used Fire Bolt freely
PRESENT → von Sanctus’s Spell Compendium
Deduction
Why Force Cage used
PRESENT → Abjuration traces
Cause of death
→ Oxygen burned away
Trial – Archeus
Timeline statement
PRESENT → Autopsy: Sibyl
Deduction
Spell Sibyl used
→ Stone Skin
Why she drowned
→ Held + immobilized
Pattern Recognition
Targets:
→ House leaders
Purpose:
→ Frame House Steelwind
Pierce Motive
Why Pierce targeted
→ Knew Celeste’s parentage
Key Question
Who received Pierce’s letter
→ The Patron
Episode 5-5
Investigation
MOVE → Frega Manor
Key Evidence
→ Laefe’s timeline
→ No Blood Contract (Aster exempt)
Cathedral
MOVE → Cathedral
Key Mechanic
→ Force Cage event updated
Tymora Office
MOVE → Tymora Office
Key Reveal
Ruby signed Blood Contract
→ Memory manipulation
Major Reveal
Eris Illmater = Empress of Discord
Episode 5-6
Trial – Eris
Statement about victims
PRESENT → Murder of Garrick Pierce
Deduction
Who killed Pierce
→ Unknown third party
Pattern
Patron:
→ skilled in lethal magic
Critical Reveal
Who signed contract that day
PRESENT → Celeste McCoy
(repeat until locked)
Celeste Testimony
Timeline contradiction
PRESENT → Laefe’s Testimony
Deduction
Why memories conflict
→ Eris altered them
Episode 5-7 (Final Phase)
Tyrion vs Eris
Contract flawless
RATIONALIZE
Timeline proof
PRESENT → Trapped King
Final Logic Chain
Why change Celeste’s memory
→ Shift timeline perception
Trigger event
PRESENT → Murder of von Sanctus
Why Celeste handed contract
→ Aria dropped it
Resurrection claim
INTERPRET
Mechanism
PRESENT → Feign Death
Final Reveal
Who killed Pierce
PRESENT → Garrick Pierce
(Suicide breaks contract condition)
Contract Collapse
Final statement
PRESENT → Trapped King
Final Deduction
Aster’s role
→ The Patron
What Aria believed
→ Marriage contract
Reality
→ Blood Contract
Final Reveal
Celeste’s father
PRESENT → Rathallion (Scaled Lord)