
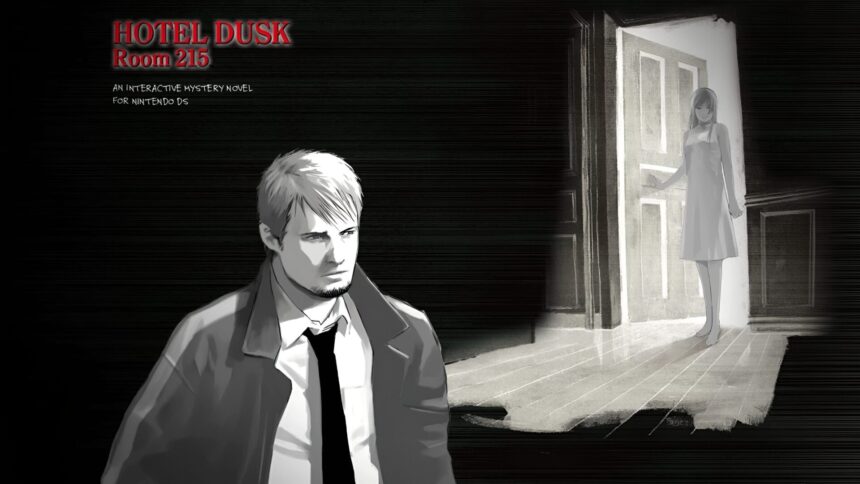
This Nintendo DS walkthrough follows the full ten-chapter mystery in chronological order, including the major required object interactions, puzzles, interrogation answers and ending variations. Some dialogue sequences require questioning a character until every question icon is cleared. Save frequently and reload after any expulsion or game over if you want the additional scene after the credits. The chapter-end memory quiz uses the same answer order throughout: B, A, C, B, A.
Chapter 1 – 5:00–5:30 PM
Enter the hotel and inspect the reception counter
Ring the desk bell three times to call Dunning
Fill in the registration form and receive Room 215’s key
Take the stairs and speak with Melissa
Rotate the loose puzzle pieces until they fit the picture
Meet Jeff Angel in the second-floor corridor
Use your room key on Room 215
Answer the telephone and complete the conversation
Answer the second call when it rings
Inspect the locked suitcase beside the bed
Use the Suitcase Key and try turning it in the lock
Inspect the hotel brochure on the desk and collect its paper clip
Straighten the clip at its highlighted points
Try the resulting thin wire in the suitcase lock
Answer the knock at your door
Tap the uppermost delivery box
During Louie’s introduction, tap the exclamation icon when it appears to avoid an early game over
Ask Louie why he sounds familiar
Ask what happened during the earlier incident
Inspect the top parcel and question Louie about the delivery
When asked about the old item, select I hung it up
Look inside the delivery box and retrieve the brown notebook
Find Melissa in the corridor and ask why she cannot see her mother
Ask about her plans to visit her mother and where her mother went
Examine Melissa’s notebook and give her the missing puzzle piece
Go downstairs and speak to Mila and Rosa in the lobby
Return upstairs and knock on Room 213
Talk to Iris when she approaches in the hallway
Return to 215 and speak to Martin Summer at the door
Inspect your new parcel, especially the client list and order sheet
Call Red Crown using the room phone
Complete the end-of-chapter review
Chapter 2 – 5:30–6:00 PM
Leave Room 215 and question Rosa in the hallway
For the longer conversation choose What stories?, then Can’t talk, and Don’t push it
Open the linen closet at the end of the corridor
Speak to Louie inside
Inspect the shelf and collect the magazine
Open the locker and collect the tools from its toolbox
Speak to Helen as you approach the stairs
Visit Helen in Room 212 and finish her questions
Return to Room 215
Use the pliers on the metal coat hanger near the door
Cut both ends so only the long straight section remains
Use that thick wire on the suitcase lock
Move the wire until all three lock components engage
Open the suitcase and take the cash
Put the client list into the suitcase for safekeeping
Go downstairs and knock on Dunning’s office door
Enter the office once Dunning leaves
Inspect the filing cabinet and the top-right drawer
Examine Dunning’s desk, the birthday card, blue notebook and calendar
Inspect the note trapped beneath the other cabinet
Use the crowbar to lift the cabinet slowly without dropping it
Pick up the concealed paper and inspect the keys on the wall
Leave and speak to Louie
Tell him your earlier conversation was not about him and choose to trust him
Question Rosa about what is wrong
Say you never met the person she asks about
Choose not to tell her anything
Ask about the suspicious behavior
Call Red Crown from Room 215
Go downstairs and ask Dunning where Louie is
Enter the corridor behind Dunning and locate Louie’s room
Question Louie and say you do not believe he committed the offense
For his reason for leaving New York, refer to Danny’s death
Finish Louie’s questions and the chapter review
Chapter 3 – 6:00–7:00 PM
Answer the telephone at the beginning of the chapter
Go downstairs and speak with Kevin
Enter the restaurant and question the people by its entrance
When prompted, ask What’s the matter? and You look upset
Find and collect Melissa’s rag doll
Sit at the center table and finish dinner
Speak with Summer and deny reading his notebook
Question Rosa about whether she knows the man under discussion
Leave the restaurant and speak with Louie
Speak with Mila in the passage, then head upstairs
After meeting Helen, return to the restaurant
Speak with Louie and collect the pen
Use the pen on the chalk near the restaurant board, or on the leaking bag in the kitchen
Rub away its coating and inspect its engraving
Return the pen to Louie
Visit Room 219 and return the doll to Melissa
Examine her puzzle box and arrange all the pieces
Close the Nintendo DS lid while viewing the completed puzzle
Open the lid to see the concealed message on the reverse
Speak with Kevin when he returns
At 6:40, inspect the parcel in Room 215
Tap along its sides and flap until Summer’s bookmark becomes accessible
Remove the bookmark
Visit Summer in Room 211 and return it
Knock on Room 218 and speak with Louie in the restaurant
Enter the electrical room from the left-side passage
Inspect the exposed electrical board
Flip its two switches together to restore the power
Return to Room 218
When questioning Melissa, choose Things aren’t going well, Why do you think that?, and Did Dad know this place?
Reassure her that her father hated seeing her sad, that it was not her fault, and that he knows
Speak to Kevin in the hall
Go onto the rooftop and speak to Iris
Complete the chapter review
Chapter 4 – 7:00–8:00 PM
Return to Room 215 and answer the phone
Open the door to receive Room 217’s key and the pen
Before entering Room 217, speak with Jeff outside Room 213
Continue questioning him until he leaves the hallway
Unlock Room 217 and enter
Inspect the painting and remove the item protruding from its lower-right corner
Examine the lighter inside the top dresser drawer
Return to Room 215 and enter the bathroom
Examine the toilet
Try flushing it and note that it does not work
Slide the toilet tank lid aside with the stylus
Lift off the cistern lid and retrieve the hidden cash
Answer the next telephone call
Finish the conversation before leaving the room.
Put the small red box inside Kyle’s suitcase.
Put the recovered cash inside the suitcase as well.
Close the suitcase and make sure neither item remains in the inventory before returning to the hallway
Go to reception and speak to Jeff
Find Rosa upstairs and take the book she gives you
Return to the front desk after the following scene
Show Dunning Kyle’s own money while he is at reception to exchange it for four quarters
Do this during the Chapter 4 reception visit because the exchange opportunity is limited
Ask him about the incident and whether he suspects you
Speak to Summer and inspect all parts of the newspaper
Go back toward the lobby and take the left route until Rosa stops you
Ask whether there are more stairs
Enter the upper-right passage she describes
Speak with Dunning upstairs about what is missing and Jeff
Go back into the linen closet
Open the locker and inspect the toolbox
Use the inventory menu to place each of the three borrowed tools back inside the toolbox
Check that all three have been returned before leaving
Knock on Room 211 and enter to question Summer
Ask about an unknown hotel
Show Summer the book, the pen and the book again
Investigate his notebook while he is away
Return to Room 215 before going downstairs
Open Kyle’s suitcase
Put away the client list
Put away the Room 217 key
Put away the incriminating memo
Confirm that the cash and red box are also stored inside
Confirm that the three tools have been returned to the linen closet
Only now go downstairs; Dunning can stop Kyle if he is still carrying suspicious belongings
Go to the kitchen and show the book to Rosa
Return to Room 211 and confront Summer
For the confrontation choose But if you can do it
Choose Different handwriting
Choose Not Alan
Explain that the evidence exposes him
For the handwriting comparison circle the ER on both documents
Ask who actually wrote the work and finish his admission
Complete the chapter review
Chapter 5 – 8:00–9:00 PM
Answer the room phone and go downstairs
Speak with Jeff and ask What’s wrong now?
Question Dunning about the situation
Take the right-hand hallway to Rosa’s quarters
Enter Rosa’s room and speak to Mila
Examine the notebook each time Mila passes it to you
Return to Room 215 and answer Melissa’s knock
Open the box near your bed to obtain the miniature sewing machine
Draw the required zigzag stitches on Melissa’s doll
Visit Jeff in Room 213
Go to the laundry room off the left-hand hallway
Inspect the yellow laundry cart
Remove the sheets and lift its upper flap
Tell Louie you found something worthwhile
Enter Room 217, move forward until the event plays, and leave
Go to Room 213; do not open the utility closet on the way
Inspect the key attached to the bag and the identification card in the coat
As Jeff confronts you, choose Cash in the john
Choose Eyewitness
Choose I know about the cash
Finish the resulting questions
Collect the paper from the front desk
Return to Room 215 and withdraw the stored cash
Go back to Jeff and show the spare keys
Show his student ID
Show the cash
Show the pistol
When accusing him, choose Wanted trouble
Choose You wanted it found
Choose Damon
Complete the questioning and chapter review
Chapter 6 – 9:00–10:00 PM
Answer the telephone
Go to the bar and question Louie
When his reason for being there comes up, answer Vacation
Speak with Helen and begin the coin puzzle
Move the bottom coin up one position onto another coin
Complete Helen’s subsequent conversation
Speak with Iris when she arrives
Inspect the matchsticks on the lower-right table
Solve either matchstick layout by removing marked sticks to leave three shapes
Speak with Summer when he arrives
Inspect the matchsticks again and let Louie return
Leave the bar and speak to Rosa
Reenter the restaurant to speak with Dunning
Return to Rosa for the wine investigation
Find the first bottle at a restaurant table
Find the second bottle on the kitchen’s middle counter
Find the third on the kitchen’s left counter
Ask Summer in Room 211 which wine he drank
Ask Iris in Room 216 the same question
Take the adhesive remover from your box in Room 215
Apply it to the red wine’s label and peel the label off
Visit Helen in Room 212 and show her the label
In her confrontation choose Just curious
Choose You don’t know
Ask if she cares about the man
Ask if she misses him too much
Visit Room 211 and obtain the pen from Summer
Show the pen to Helen and finish her questions
Complete the chapter review
Chapter 7 – 10:00–11:00 PM
Go to the bar and speak to Louie
When Summer arrives, choose Tell him the truth to avoid being expelled
Speak to Melissa outside the bar
If you won the rabbit doll, hand it over
Speak to Rosa and clarify that the child did not receive a gift
Go to the storage room above Rosa’s room in the right-hand corridor
Move the boxes out of the way
Open the Christmas tree box
Place each decoration on the matching-color hook
Speak with Melissa and then Mila
Collect the black light before leaving storage
Enter Dunning’s room and inspect the photograph on its south wall
Go to the lobby and talk to Kevin
Follow him to the front desk and continue questioning
Go to the bar, watch the scene and speak with Louie
Go upstairs and question Iris in Room 216
Follow Kevin downstairs when he flees
At the front desk, choose Business
Choose Reasons for asking
During the confrontation choose I believe you just met
Choose You never worked there
Choose It was you
Finish the remaining questions and chapter review
Chapter 8 – 11:00 PM–12:00 AM
Answer the telephone
Search the utility closet’s trash for a cassette tape and yellow envelope
Retrieve a pencil from Room 215
Speak with Louie in the bar, then go to his room
Insert the tape into his cassette deck
Use the pencil to wind the loose tape by stroking downward on the touchscreen
Insert it again and play Side B
Visit Iris in Room 216
Show the cassette and envelope
Ask Why did you bring it here?
Ask You didn’t know?
Confront her using Insurance
Choose You recognized it
Choose She vanished
Go back to Louie’s room and speak to him
Follow him to the hallway for the bowling game
Drag the ball straight toward the pins and complete three rounds
Collect the key revealed afterward
Find Mila on the second-floor roof and speak to her
Enter Rosa’s room, then its bedroom
Inspect the three photographs, including the picture beside the bed
Try to leave and question Rosa
Choose Don’t lie
Choose Come on now
Choose Mila’s brochure
Choose You DO know something
Choose Someone I know
Return to Room 215 and answer the telephone
Complete the chapter review
Chapter 9 – Midnight–2:00 AM
Search Room 215 for an apple image and tap the hidden Y
Go to Room 217, look at its floor picture and tap the N in the bottom-left
Find the apple image in the middle of the second-floor hallway and tap its upper-right E
Go to the central hallway and tap the hidden N within the apples
Speak to Louie in the lobby
On a starred replay, accept his special cassette and decode it in Louie’s room
Go to Rosa’s room and speak with her
To enter Room 111 with Mila, avoid the direct lobby path where Dunning can intercept you
Take the upstairs detour and descend toward Room 111
Enter the back room and inspect its final apple picture
Tap the J hidden beside the apple
Enter the five-letter answer JENNY
When the resuscitation sequence begins, close the Nintendo DS lid
Reopen the lid after the game registers the action
Speak to Mila before leaving
Open it again and speak with Mila
Outside, speak to Kevin
Return to Room 215 and use the telephone
After the knock, go to Dunning’s room and speak to Louie
Inspect the blue paint in the refrigerator
Search the bedroom desk drawer containing birthday cards
Read the newspaper clipping and old brochure
Travel to the pantry in the left hallway
Approach the concealed wine-cellar door to finish the chapter
Complete the chapter review
Chapter 10 – 2:00 AM and Conclusion
Inside the cellar, inspect the three-bottle case on the back shelf
Take the upper-right bottle from one shelf and place it in the case
Take the bottle from the opposite shelf and combine it with the one in the case to make a full bottle
Activate the shelf to reveal the concealed passage
Enter the basement and unlock the distant door
Inside, inspect the red and blue books
The following sequence is timed; avoid long pauses
Inspect the toolbox near the computer and take the hammer
Examine the top drawer and enter 518, derived from the blue-book photograph
Collect the letter inside the drawer
Open the lower drawer
Inspect the file stored inside
Use the pencil on the file
Rub the pencil back and forth over the file to create graphite powder
Examine the computer’s damaged cable connection
Apply the graphite powder at the disconnected contact
Check that power is restored
Inspect the paper near the computer
Use the black light on the faint writing on the paper
Write down the revealed number because it varies by saved game
If the black light is unavailable, tilt the DS to make the writing visible
Use the letter with the computer and set the dial to your discovered number
On an initial run, enter the displayed password; on a starred replay, use the cassette-derived password instead
After reading the terminal, leave the room and walk along the outside wall toward the corner
Investigate the loose bricks
Use the hammer to break through the wall
Enter the hidden room and collect the palette knife
Use the knife to scrape the white coating from the painting
Leave and save before going north
Confront Dunning in the final room
Choose You talked to him here?
Choose It was Bradley
Choose It was Nile
Choose You lied
Choose He didn’t say a thing
Finish the final conversation
The next morning, speak with the guests you wish to see before leaving
Find Jeff outside Room 215
If you escorted Helen earlier, meet her near the stairs during the final morning
Visit the roof to see Iris before leaving the hotel
Speak with Kevin and Melissa downstairs, Louie in the lobby and Rosa in her room
Visit Dunning at the front desk and leave Hotel Dusk to complete the story
Ending Variations – Extra Scenes
For the extra scene on a normal playthrough, avoid every game-over outcome; reload an earlier save if Kyle is expelled or dies
To unlock the starred New Game+ playthrough, complete the story and start again using cleared data
During the starred playthrough, accept the mysterious cassette from Louie in Chapter 9
Play the cassette on his recorder and write down its hidden password
Enter that password at the computer in Chapter 10
After decoding the cassette, enter Room 220 during the final morning if it becomes available
Avoid game overs on the starred playthrough for both optional ending scenes
The core story ending does not branch into different character routes
Optional Vending Machine and Star Stickers
In Chapter 4, show Dunning your cash at reception to exchange it for four quarters
Locate the star sticker behind the front desk
Find another on the left of the vending machine
Look at the south end of the central hallway by the restaurant
Check beside the restaurant hallway podium
Find the sticker in the restaurant
Inspect the area above the bar’s jukebox
Find the last sticker at the western end of the second-floor corridor
Add the numbers shown by the seven stickers to obtain your playthrough’s two-digit vending code
Use the code to claim the special prize
On a normal run the special prize is a Pinkie Rabbit doll; on a starred run it is lipstick
The rabbit doll can be given to Melissa or Mila